Updated On 05/20/2026
Replacing or repairing an underground line — whether it’s the sewer line carrying waste away from your house or the water service line bringing potable water in — is one of the more disruptive and expensive jobs a homeowner can face. Quotes from contractors can vary by thousands of dollars for what looks like the same job, and the difference often comes down to how the work is actually done — especially what happens after the new pipe is in the ground. If the soil isn’t properly compacted, you can end up with a sunken lawn, a sagging driveway, or worse, a settled trench that puts stress on the new pipe and starts the whole problem over again.
Here’s a walk-through of how the work is typically done, what should be in a good quote, and the red flags that suggest a contractor is cutting corners.
First: Is It a Sewer Line or a Water Service Line?
Before going further, it’s worth being clear about which pipe you’re dealing with, because the rules are very different. A sewer line carries waste away from your house to the city main or septic system. A water service line brings potable (drinking) water from the city main into your house. Homeowners and even some quotes use the terms loosely, but they aren’t interchangeable.
For potable water service lines, most local codes require ductile iron pipe (or copper or approved PEX, depending on jurisdiction) specifically because the pipe carries drinking water and has to meet potability standards. PVC sewer pipe is not acceptable for a water service. This matters for your quote because:
- Trenchless options are more limited. Pipe lining and pipe bursting work well for sewer pipe, but if code requires ductile iron for your water service, you may be looking at full open-trench excavation regardless of how attractive a trenchless bid sounds.
- Material costs are higher. Ductile iron is significantly more expensive per foot than PVC.
- Restoration is more extensive because the trench is open the full length.
If a contractor is quoting a water service replacement using PVC or quoting a trenchless method without confirming it meets your local water authority’s requirements, stop and verify with your municipality before signing anything.
The rest of this guide applies to both types of lines — the bedding, compaction, and quote-evaluation principles are the same — but keep the material requirement in mind when comparing bids.
Before You Got the Quote: Recognizing the Warning Signs
Most homeowners aren’t reading this for fun — they’re here because they’ve already spotted signs of a leaking or failing sewer line and a contractor has told them replacement is on the table. Slow drains, sewage smells, soggy patches in the yard, unexplained spikes in the water bill — those symptoms are what bring you to this page. This guide picks up from there: how to evaluate the quote you’re holding, or the one you’re about to request.
The Two Main Approaches
Most sewer line work falls into one of two categories, and the method matters because it affects price, disruption, and long-term results.
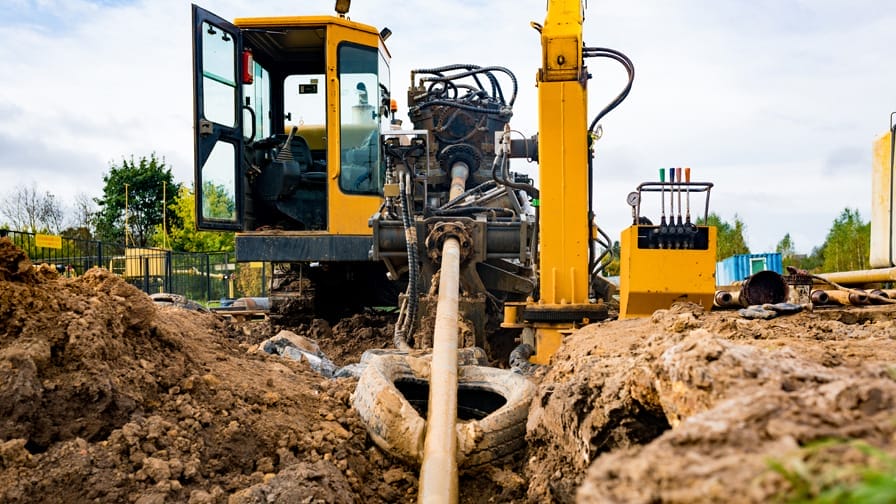
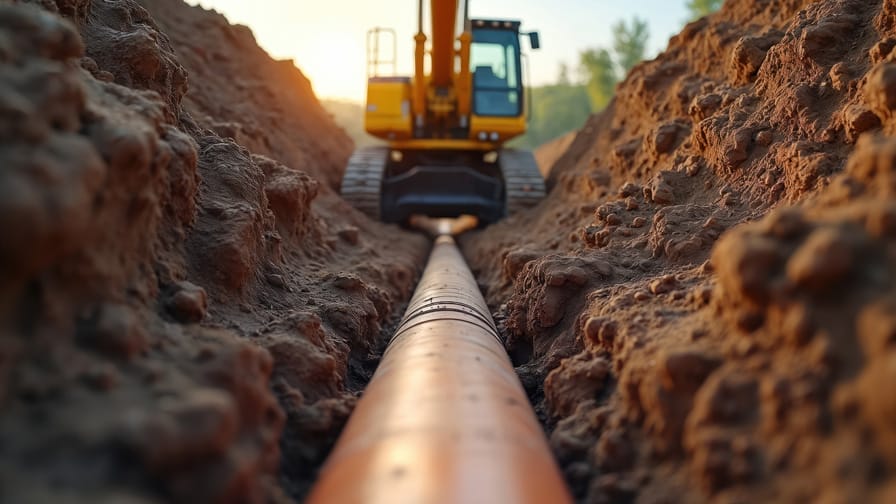
Traditional open-trench excavation means digging a trench from your house to the connection point (usually the city main in the street). It’s the most invasive option but also the most straightforward, and it lets the crew inspect the surrounding soil and bedding conditions directly. Expect torn-up lawn, possibly damaged landscaping, and disruption to walkways or driveways the line crosses under.
Trenchless methods include pipe bursting (a new pipe is pulled through the old one, breaking the old pipe outward) and pipe lining (a resin-coated liner is inserted and cured in place to form a new pipe inside the old one). These require only small access pits at each end rather than a continuous trench. They cost more per foot but often come out cheaper overall because of dramatically less restoration work — no driveway to repair, no mature landscaping to replace.
A good contractor will explain why they’re recommending one method over the other for your specific situation. Soil conditions, the depth and condition of the existing line, the presence of bends, and what’s above ground all factor in. Critically, the choice between trenchless and excavation should be driven by what the camera inspection shows — particularly whether the failure is in the pipe itself or in the soil around it. More on that below.
Why Compaction Is the Hidden Variable
Here’s the part most homeowners don’t think about until it’s too late. When a trench is dug and refilled, the soil that goes back in is loose and full of air pockets. Over time — sometimes weeks, sometimes a year or two — that soil settles. If it wasn’t compacted properly during backfill, you end up with a long, narrow depression running across your yard exactly where the trench was. In bad cases, depression becomes a trip hazard, channels water toward your foundation or shows up as a crack and dip in a driveway or sidewalk above the trench.
Proper compaction is done in lifts — meaning the trench is filled in layers, typically 6 to 12 inches at a time, with each layer compacted before the next one goes on. A jumping jack compactor (also called a rammer) is used for the narrow confines of a sewer trench because it delivers high-impact force in a small footprint. Plate compactors are used closer to the surface and on wider fills.
The bedding material around the pipe itself matters too. Quality work uses clean, graded gravel or sand for the pipe zone — typically 4 to 6 inches under the pipe and up to 12 inches above it — before native soil is used to fill the rest. This protects the pipe from point loads (a rock pressing into one spot) and gives water a place to go rather than pooling against the pipe.
Why a Camera Inspection Should Come Before the Quote
Before any reputable contractor writes a replacement quote, they should run a camera through the existing line — or look at footage from a recent inspection you already have. A sewer scope, also called a CCTV inspection on larger lines, is a small waterproof camera on a flexible cable fed through the line from a cleanout (or a pulled toilet, if there’s no cleanout). It produces live video of the inside of the pipe, and a reputable plumber will record it and give you a copy on a thumb drive or a shared link.
Skipping this step is one of the biggest reasons two quotes for the “same” job can be wildly different. Without a camera inspection, a contractor is essentially guessing about how much pipe needs replacing, what’s actually wrong with it, and which method will work. The camera tells you whether you’re dealing with a single offset joint that needs a spot repair, root intrusion that might be solved with lining, a belly that has to be dug out and re-graded, or a fully collapsed line. Those are four very different jobs at four very different prices.
The camera also locates the problem. Modern inspection cameras have a transmitter at the head, and the technician uses a locator above ground to pinpoint exactly where the camera is — both depth and position. That means if the issue is a 6-foot section of cracked pipe 30 feet from the house, you don’t need to replace the whole 80-foot run. A contractor working without that information will often just quote the full replacement because it’s the safe bet for them. It’s not the safe bet for your wallet.
How the Camera Should Fit Into the Service You Called About
Not every plumbing call requires a camera inspection. Whether one is warranted depends on what brought you to the call and what the technician observes once on site. Three patterns cover most situations:
Diagnostic-first calls. When the camera is the service — you want a second opinion on an existing repair quote, you’re documenting the condition of a sewer lateral on a property you already own, you’re getting a baseline inspection on an older home that has never been scoped, or you’re documenting the condition of a main on a commercial property — the inspection is the deliverable.
Repair work that requires a camera. When the call is for trenchless repair, sewer line replacement, or any work that depends on knowing the condition and location of the failure, a camera inspection should be part of the scope — not an upsell added later. A replacement quote written without one is a guess. A trenchless method recommendation made without one is the contractor reaching for whatever’s in the truck. The camera should be priced into the work, run before any decision is made, and run again after the repair is complete to verify the result.
Entry-level reactive calls. When the call is for a clogged drain or a one-time blockage, the immediate scope of work is clearing the clog. Whether a camera inspection is warranted beyond that depends on what you tell the technician about the situation, and what the technician observes while the work is in progress.
A camera inspection is worth adding to a drain cleaning call when:
- The clog is recurring — you’ve cleared this same line multiple times in the last year
- You’re hearing gurgling sounds from other fixtures when this one drains
- Multiple drains in the home are slow, not just the one you called about
- The clog cleared but the line drains more slowly than it should afterward
- The technician pulls out unusual material — roots, scale, debris that shouldn’t be in a residential line
- The home is older and the line has never been inspected
- Sewage smell persists after the clog is cleared
- You’ve had a backup before, even if it cleared on its own
Any of those signals points to something a camera would actually find. None of them is the technician’s discretion — they’re patterns the homeowner can recognize and ask about directly.
When none of those signals is present, the camera isn’t warranted. A straightforward kitchen-sink clog from a buildup of grease and food, cleared cleanly with no recurrence history and no other symptoms, doesn’t need a camera. Adding one to that call would be the kind of upsell that’s worth declining. The question to ask the technician isn’t “do I need this?” — it’s “what about today’s call points to something a camera would find?” An honest answer references specific symptoms. A vague answer is a sales tactic.
What the Camera Is Actually Showing You
Here’s the part most homeowners — and a surprising number of contractors — get wrong. The camera doesn’t just show the condition of the pipe. It also shows you, indirectly, what’s happening to the soil and bedding around the pipe. And that distinction often determines whether the right repair is trenchless or full excavation.
Pipe-side findings are what most people expect to see on an inspection: cracks, root intrusion at joints, internal corrosion in cast iron, scale and mineral buildup, grease accumulation, the predictable post-50-year breakdown of Orangeburg. The pipe is in this condition; the camera shows it; the report describes it. When the pipe is the problem and the soil around it is sound, trenchless methods often work well — the structural problem is inside the pipe, and lining or pipe-bursting addresses the actual failure point.
Substrate-side findings are different, and they’re where camera inspection moves from documentation to diagnosis. When the technician sees a belly (a sagged section that pools water), a slope that drifts from the design grade, joints pulled apart on a pipe that’s otherwise sound, or visible voids through cracks in the pipe wall, those are signals that the soil and bedding around the pipe have failed. The pipe is the visible victim, but the cause is on the other side of the pipe wall — the bedding washed out, the backfill settled unevenly, vibration migrated fine soil particles downward and left gaps, or the trench was never properly compacted to begin with. (For a deeper look at how soil conditions, water, and vibration drive sewer infrastructure failure — and why this is particularly aggressive in New Jersey — see our guide on why sewer lines fail.)
This matters enormously for your repair decision. Trenchless methods don’t address conditions outside the pipe. A new liner inside a pipe with a belly preserves the belly. A pipe-bursting job pulls a new pipe through roughly the same path through the same soil that caused the original failure. If the substrate is the actual problem, a trenchless repair will fail again on the same timeline as the original — and you’ll have paid for it twice.
Real repair of a substrate-driven failure requires excavation: removing the failed soil, replacing the bedding with proper material (clean stone or graded sand), and re-laying the pipe at correct slope with proper lift-by-lift compaction. Which is exactly the work covered in the compaction section below. Soil failure on the way in and soil failure on the way out are the same problem viewed from two ends.
Reading the Footage Is a Skill, Not a Default
A contractor who runs a camera through your line and only flags root intrusion and cracks isn’t completing the diagnostic. Substrate signatures take training to recognize. The four to look for: pooling pattern and depth that indicate where and how badly the line has settled; joint separation without pipe-side damage; gradient drift that interrupts the design fall; and defects clustered in patterns that align with surface conditions above the line.
When the camera identifies a substrate signal, the camera has done what it can. It can see that the pipe has settled or that joints have pulled apart. It can’t see why, how far the affected zone extends, or what the bedding actually looks like in that spot. The honest next step is some form of excavation to physically verify the soil condition before recommending a repair method. Hydro-excavation — which uses pressurized water and a vacuum to selectively expose pipe and soil without a full open trench — is particularly suited to this kind of selective verification. It costs extra and usually requires a separate visit, but it’s the only way to confirm what the camera could only indicate. (For more on what a proper inspection should include, the difference between sewer scope and CCTV, and how hydro-excavation fits in, see our guide on what cameras actually show.)
A contractor who treats the camera as the final word, when the camera footage is telling them the diagnostic isn’t complete, is going to recommend whichever repair method fits their existing toolkit — usually a trenchless option. That’s not always the wrong recommendation, but it’s not based on confirmed conditions, and on a substrate-driven failure it’s the start of a repeat job.
Practical Things to Look For
A few specifics around the inspection itself:
- Get the full video, not just findings. “It’s bad, you need to replace it” is not a diagnosis. You want footage you can review, with someone walking you through what they’re pointing at.
- Get locator data showing the path and depth of the line. Essential for any subsequent repair decision and any discussion of where the actual problem is.
- Make sure slope and pooling are part of the assessment, not just defect identification. A line can have no cracks and still have a critical slope problem, and a contractor who skips slope assessment is missing the substrate signals entirely.
- The inspection should be independent of the repair recommendation. Whether you’re paying for the camera as its own service or it’s bundled into a larger scope of work, the read should describe what’s in the line — not what the contractor’s truck is set up to repair. If the footage comes with a repair recommendation that doesn’t reference specific findings from the inspection, that’s a sales process, not a diagnostic.
- The line may need to be cleared before it can be inspected. If it’s fully blocked, the camera can’t get past the obstruction. A snake or hydro-jet first is normal — just make sure it’s disclosed up front.
- Make sure the inspection is recent. Footage from two years ago doesn’t reflect what the line looks like today.
- Watch the property line. If the camera reaches the boundary with the municipal main and stops, and you’re getting “we don’t know, must be your problem” as the answer, the issue may actually be at or past the city’s tap-in — meaning it’s the municipality’s responsibility, not yours. CCTV inspection of the connection is what documents that.
If you already have a camera inspection from a home inspector or a previous plumber, share it with each contractor you’re getting quotes from. Same starting information for every bidder is the only way to compare bids on equal footing. And on the replacement quote itself, look for explicit references to what the camera found, including any substrate signals: “replace 22 feet of cast iron from cleanout to property line per camera inspection dated [date], showing offset joint at 18 feet, longitudinal crack at 21 feet, and 1.5-inch belly at 14–17 feet indicating bedding settlement; hydro-excavation recommended at the belly to verify substrate before backfill.” That kind of specificity is what separates a real scope of work from a guess.
What Should Be in a Quote
A vague quote is a warning sign. Details protect both you and the contractor. Here’s what to look for in writing:
Scope and method. Open trench or trenchless? Which trenchless method? How many feet of pipe? What pipe material — for sewer, typically PVC schedule 40 or SDR 35; for water service, ductile iron, copper, or approved PEX per local code. Cleanouts (sewer) or shutoff valves and meter pit details (water) should be specified. The scope should reference the camera inspection findings, not just describe a generic full replacement.
Permit and inspection scheduling. Sewer work almost always requires a permit and an inspection. Water service work typically requires coordination with the water utility for the connection at the main, and sometimes a separate health department sign-off. The quote should specify who handles each.
Excavation and shoring details. How deep is the dig? Trenches over 5 feet deep generally require shoring or sloping for worker safety per OSHA — this is non-negotiable, and a contractor who shrugs it off is one to avoid.
Bedding specification. The quote should name the bedding material (e.g., “3/4-inch clean stone” or “ASTM C33 sand”) and the depth above and below the pipe.
Backfill and compaction method. This is the line item that separates a good quote from a bad one. Look for language like “backfill in 8-inch lifts, mechanically compacted with a jumping jack rammer to 95% standard Proctor density” or similar. If a quote just says “backfill trench” with no method specified, ask. The honest answer might be “we just push the dirt back in and let it settle,” and now you know.
Surface restoration. What’s the contractor responsible for putting back? Topsoil and seed? Sod? Asphalt patch? Concrete? At what thickness? Will they come back if the trench settles within a year? A settlement guarantee — even just 6 to 12 months — is a strong sign that the contractor has confidence in their compaction work.
Post-work camera inspection. Just as a camera should go through the line before the work, a final camera pass after the new pipe is installed and before the trench is backfilled is the cleanest way to verify the job was done right. Some contractors include this; many don’t unless you ask. It’s worth requesting.
Warranty terms. Most reputable contractors warranty workmanship for at least a year, and pipe materials carry their own manufacturer warranty. Get this in writing.
Red Flags
A few things that should make you keep shopping:
- A bid that’s dramatically lower than others, with no clear explanation of why
- A replacement quote with no camera inspection performed, or the contractor refusing to share the footage
- A camera review that only flags pipe damage and never mentions slope, pooling, or substrate conditions
- Pressure to do a trenchless repair when the camera shows a belly, settled section, or separated joint without a clear cause in the pipe itself
- Heavy pressure to do a full replacement when the camera shows a localized problem
- No mention of compaction method or bedding material
- No permit included, or a suggestion to skip the permit
- Vague restoration terms like “we’ll put the dirt back”
- Pressure to decide today
- No written warranty
- No proof of insurance and bonding
Questions to Ask Before You Sign
Walking through these with a contractor tells you a lot about how they work:
Have you run a camera through the line, and can I see the footage? What specifically did the camera show that’s driving this scope of work? If the camera shows a belly, a settled section, or a separated joint without a clear pipe-side cause, what’s your recommendation? How will you compact the trench, and in what lift sizes? What bedding material goes around the pipe, and how much? Will the trench be inspected before you backfill — both by the municipal inspector and with a final camera pass? What happens if my lawn or driveway settles in six months? Are you pulling the permit, and is the inspection cost included? Can you provide references from jobs done a year or two ago that I can drive by or call?
That last one is underrated. A contractor’s work looks great the day they leave. The real test is what it looks like after a winter and a spring of freeze-thaw cycles. References from older jobs tell you whether the compaction held up.
The substrate question — what the contractor recommends when the camera shows a settled or separated section without a clear pipe-side cause — is the one that distinguishes a contractor solving your problem from one selling a method. The answer you want is some form of excavation to verify the soil condition before committing to a repair. The answer that should worry you is whichever trenchless option the contractor was going to quote anyway.
Already Have a Quote? Get a Free Second Opinion
If you’ve already received a sewer line replacement quote and something about it isn’t sitting right — the price seems high, the camera footage was never shared, the recommendation jumped straight to full replacement, or the contractor couldn’t explain why a trenchless method was the right call for your specific situation — a second opinion costs you nothing and frequently changes the conversation.
We offer free second opinions on existing sewer line repair and replacement quotes across central New Jersey. Bring us whatever you have — the written quote, any camera footage, the contractor’s recommendation — and we’ll walk through it with you. We’ll tell you whether the scope of work matches the diagnosis, whether the method recommendation makes sense for what the camera shows, and whether the bedding, compaction, and restoration specs are what you should be paying for.
If your existing contractor got it right, we’ll tell you that too. We’d rather lose a job to a competitor doing good work than win one by talking to a homeowner out of a sound recommendation. And if the quote you have doesn’t match the diagnosis — or there is no real diagnosis — we’ll show you what a quote should look like.
Contact Arrow Sewer & Drain for a free second opinion on your sewer line quote, or for a fresh camera inspection if you don’t have one yet. We provide sewer evaluation and repair across New Jersey for residential, commercial, and municipal systems, with primary service in Middlesex, Somerset, Union, and Hunterdon counties. If you’re elsewhere in NJ, contact us — we may still be able to help.
The Bottom Line
The cheapest sewer quote is rarely the best value. The work below the pipe and above it — the bedding and the compacted backfill — is what determines whether your yard looks normal in two years or whether you’re staring at a trench-shaped depression every time you mow. And the work before the quote — a real camera inspection with footage you can review, read by a technician who knows the difference between a pipe failure and a substrate failure — is what determines whether you’re paying to fix the actual problem or paying to fix a contractor’s worst-case guess.
When you compare quotes, compare what’s specified, not just the totals. A few hundred dollars for a proper camera inspection, and a few hundred more for proper lift compaction and clean bedding stone, is cheap insurance against thousands in re-grading, re-sodding, driveway repair — or worst of all, paying for the same repair twice when the real problem was never addressed the first time.
Receive A Second Opinion On Your Sewer Line Replacement
Contact us Today
Get to the bottom of what is causing your sewer line failure.
Request An Estimate